Thursday, February 21, 2013

More from Russia...

Another good one I came across. This looks like a space shuttle launch - but in reverse with the big smoke cloud behind it. Why don't we ever get lucky to see something like this in Seattle? Maybe it does happen, but it's cloudy!
Kind of interesting the similarities of this scene with the one in the Deep Impact movie from a few years back.

Fact:


Fiction (Scene from Deep Impact - some similarities!)

Other side of the Russian Meteor

I came across another good video compilation of the Russian attack from space.  This time we see the impact of the shockwave as it hits as well as the windows breaking.
I wonder if the woman at 2:15 got the job she was interviewing for?  Ha!


Wednesday, February 20, 2013

Russian Meteor

So unless you have been in a cave the last few days, you have probably heard of the asteroid that passed close to Earth last week. That was fun, but what was even more impressive was the totally unrelated chunk of rock that hit over Russia the same day. Kind of like "Tunguska II" if it was a movie. But this one was probably smaller even though it was reported to have the power of the atomic bomb, it blew up at a high altitude and only broke a lot of windows and cut up a about 1,000 people from glass. Here is a good collection of videos of the event from a guy in Russia that collected them an posted them on a web page. I'll admit that I was quite unproductive this morning at work since I had to look at all these!


Infographic on the event. I just noticed one error, the "GPS orbit" should read "Geosynchronous orbit" (this is the orbit that the TV satellites live) - where "Honey Boo Boo" is beamed to Earth from.
| Russian meteor videos |

Wednesday, January 9, 2013

First deep sky image for 2013

Finally a break in the cruddy weather. At least for one night. That seems to be about what can be expected these last years. Here is my first image of the new year, I had a nice chance to give the observatory a workout and test out the systems. All was working pretty well, but I still don't have the dome rotation synced with the telescope mount yet. So I have to slew it manually. This is another attempt at my favorite winter object - Orion Nebula (M42) and the "Running Man" above it. The photo is made up of about 30 images varying from about 12 seconds exposure (to get the bright center) and up to about 5.5 minutes to capture the dim outer edges of the nebula. Taken with a Canon 350D at ISO 800, Orion 80ED Apo Refractor, piggybacked and guided by the 12" LX200. Once again, the wait for another clear night begins....

Tuesday, December 4, 2012

Friday, November 16, 2012

Too many clouds makes me crabby.

....but then a clear night without any clouds, still makes me crabby - in a "Crab Nebula" kind of way!  Messier 1 or M1 for short.  I still don't really see a crab in this, but maybe when Charles Messier cataloged this it might have looked like a crab back then.
Clear! (it was about 20 minutes
before this was taken)
This is probably the first "serious" image taken since the new observatory has been put into operation.  I still have some work to do, mainly syncing up the dome and scope so the hole lines up at all times.  More on that later.
I'm pretty happy with how this turned out.  The autoguiding was working very well and I only have very minimal star training or "Twinkie" stars as I call them (RIP Twinkies - but know you will always be around ad edible).  I was experimenting with a 30 day trial of some Canon EOS software that I think I really like a lot, it even moves the PHD guider software for auto-dithering.  Pretty nice.
The photo is made up of 9 images taken at f/6.3, ISO 800 and 300 second exposures.  My biggest gripe right now, other than cloudy skies, is the fact that it's been well over a year since I've done any serious imaging (I'm a serious believer in climate change!) since skies have just sucked for a long, long time.  It's been so long that I've forgotten a lot of my processing skills that I learned.  That's really annoying as I sit staring at hot pixels on the screen scratching my head and muttering through clenched teeth "how the **** do I do this again?!"
More to come?  Sure, just a matter of when.

Summer work on the Astro-Shack Observatory (Part 1)

I've been slacking on the blog site way too long.  I think my astronomical interest seems to dwindle with the increase of clouds or lack of good skies around here.  Sure, we had a pretty amazing summer with 80+ days with zero rain but once skies cleared up enough and the moon was out of the way, we had forest fires and HUGE amounts of smoke which destroyed even the darkest blue Clear Sky Chart predictions I've seen in a long time.
The dome in the original location on
Little Bear Observatory
I did a lot of work on the Astro-shack over this time though.  EAS inherited a dome from Tomas Palmer (same generous guy who donated the 12" Meade).  Tomas, if you read this blog, please contact me.  I lost touch and your phone number didn't work when you moved!
Anyway, I did some upgrades to the observatory by putting a dome on the roof.   I foolishly did all this work myself with the constant risk of falling off the roof, stepping off the top of the ladder, or other hazards of solo construction.   I have great balance and a sore back but I did accomplish the task!
It started with a trip to Redmond to remove the dome from Tomas' roof.  Not too hard despite the shutter door flying off the dome on it's own, but nobody got hurt. 
A couple trips in the truck, and the dome parts were
in my backyard ready for cleaning and assembly
It took a couple truck loads to get all the parts home.  Then I spent a few hours cleaning years of grim and gunk off the fiberglass parts.  Boat soap works well and the Mr. Clean Magic Erasers for the tough scuff marks.   
It all fits together!
Can't procrastinate once the roof
is pulled off.  Gotta do it!
It was then assembled on my deck to line up all the holes and figure out where all the puzzle pieces when together.  I marked the parts with a pencil so I could get everything in the right place again later. 
I knew where I was going to mount this thin on the roof, so I climbed up and simply started pulling panels off.   This was very late July, so I figured I had maybe a month if I was lucky to do this before the rain....got lucky and had almost 3 months.
Some rafters cut out, and the new
dome support frame is seen around the
bottom half of the roof. 
The flange was an 80 inch square so my plan was to build a frame around the roof that it would just neatly sit in and be bolted down.  Measure three times, cut once.  That's my rule that I follow - most of the time unless I get cocky (that when mistakes happened).
Rafters cut out leaving the square
frame ready for the dome flange.
Flange was tight, but fit perfectly.
I basically stripped down the roof to the bare rafters and build the square support around the rafters leaving the peaked roof in place until I was ready to cut that all out and put the dome in place.  I figured that might be the easiest way to do this, and the triangular shape of the roof would give it some strength from the angles.  I did add plenty of other cross-pieces around the square just to make sure.  Once the frame was secure, I could then remove the remains of the old roof and leave the new support in place ready for the dome to rest on top.
I then put the flange in place one corner at a time.  I nearly panicked briefly when it seemed that I didn't take into account the thickness of the fiberglass, but with some gentle pounding, nudging and yes - cussing - I got it in place.  All screw hole lined up beautifully but tightly.  Perfect bit of engineering work on my part!
Next on part II, I'll show you the dome and telescope mount modifications.


Monday, August 27, 2012

Some more photos of Neil Armstrong

Thanks to Robert Perlman of CollectSpace.com for sharing some other great photos of Neil Armstrong.


Sunday, August 26, 2012

Tuesday, August 7, 2012

So amazing...and we haven't rolled yet!

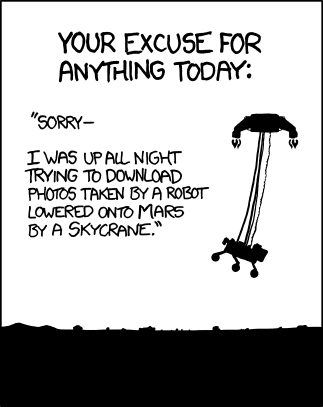
Just over 24 hours after Curiosity landed, the images keep pouring in.  Kind of embarrassing that I seem to get a lot of my news from Facebook, but I pretty much have all my aviation and space addictions and fetishes filtered down pretty well there and the photos keep showing up!
Anyway, the most impressive thing this afternoon to come from Mars was a little animated video taken from the rover just after the heat shield dropped away exposing the camera all the way down to the surface.  Notice the dust cloud in the circular pattern as the sky crane engine exhaust hit the surface. The wheel can be seen appearing like "landing gear" as the rover landed on the surface.
So next we'll see these same photos in 1600x1200 resolution!  So if I have already fallen out of my chair seeing these, where to I fall when it gets better?  The rover hasn't even moved yet!
I had a feeling that the NASA site would have probably gotten bogged down to hardly a slideshow, so I attended the landing party at the Museum of Flight in Seattle.  They expected maybe 200 people to show up, but then there was over 600. Theater was packed, lobby was packed and they had to open the theater in the main gallery so everyone could get a view.  Loud cheering, screaming and and excitement  when the landing announcement was made.  I'm sure the museum crowd could have out-screamed the JPL crew!  Very exciting to see, and yes, the last 7 minutes were very tense and terrifying hoping the thing wouldn't add a new crater.  Wow.
At midnight I finally headed home relieved and excited to see what would show up the next morning.  Such fun!


Monday, August 6, 2012

Six more wheels on Mars!

Need I say more?  :-)