Thursday, June 18, 2015

Our new "Gemini" two seater.

As some of you know, Traci and I are building an airplane in our home hangar here at Crest Airpark.  Do we ever have enough projects around here to work on?  In addition to building the new Astro-shack, working on growing a home business, maintaining the yard, and managing a bunch of cats.
Our latest addition to the airport home is a 1973 Cessna 150L that we just picked up from Prosser last week.   The plane flies great, has a strong engine with fairly low time, and best of all will get us airborne and make us feel like we fit in with our other flying neighbors around here! 
It does need a little cosmetic work mainly replace cracked panels in the cockpit (very common with these vintage planes) and some other improvements.
Eventually, we may add commercial insurance so I can do a little flight training in it, but that's later on as we work out ideas and get a few projects done around here.

Jet thinking of the bird hunting possibilities with a C-150

Everything Gemini

Just a fun thing I stumbled across in the aimless internet wanderings.  Actually, this showed up on Facebook on one of the many space geek groups I'm in.  
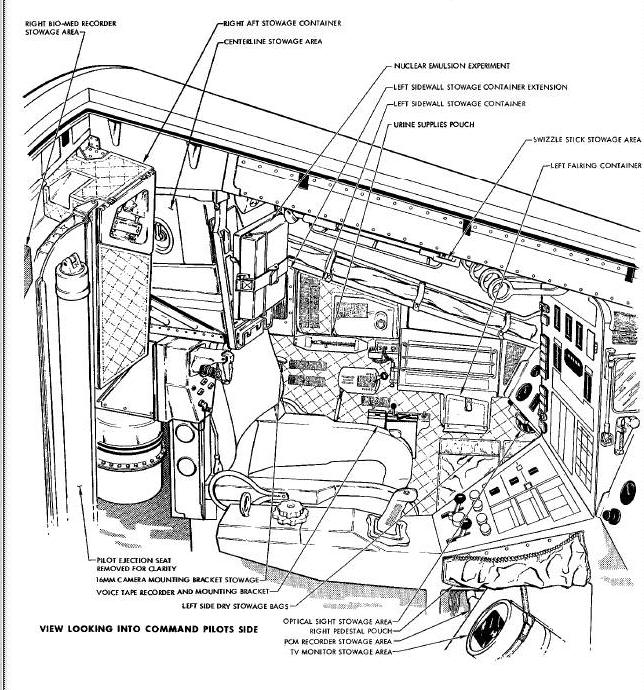
Kind of a fun interactive page full of diagrams and stuff from the Gemini spacecraft.  If you look at the main pane images, click on some of the buttons and controls - a new page pops up with a short description of the control that you clicked on.  I think a lot of work has gone into this web page! 
There are a lot of diagrams that I haven't seen before. Fun stuff!


Monday, June 1, 2015

Big Blue is home finally

Big Blue finally was dragged out of storage on the same wagon as the cement, pier and rocks dug out of the hole.  (It's a useful thing around here!).
The scope is about 80+ lbs but Traci and I together were able to get on each side of it and lift it up on the pier.  The height in relation to the dome opening turned out perfectly.  As expected (yes, even with the low Hobbit sized door) a raised floor or platform will be needed to reach the scope easily.  That's one of the next projects on the list.  
Scope is in new home

As planned, the height and the hole lined up just right

A floor platform will be needed

Danger - black hole where not even eyepieces can escape

Dangerous hole!
I realized once this was installed that I had a very dangerous situation that could result in a very difficult retrieval.  The hole at the top of the pier could easily attract and suck in telescope mounting nuts, eyepieces, evening observing snacks, cell phones...or anything that fits in an 8x8 inch opening!
Safely covered
Fixed that problem with some scrap and covered up that danger.  Later I did paint this black.


Test fitting the wedge


Drilling the holes for the bolts

Drilling template
After a lot of discussion, thoughts and other positive negatives about how to mount this thing, we figured that the best thing do do would be do use anchor bolts to hold this thing to the ground.  The last one I built I had threaded rods embedded into the cement as it was poured.  The bolts used were 1/2 inch diameter and about 7 inches long.
A template was cut out to match the base holes on the pier and used as a guide for lining up the hole properly.   A hammer drill with masonry bits was used to drill the holes.  Drilling cement is surprisingly easy, just make sure to wear eye, ear and lung protection from the noise and dust that seems to squirt up in your face when pulling the bit out of the hole!
A straw taped to the hose of the shopvac was used to suck out the dust from the hole and clear it for the bolt to be pounded and then tightened down.
One bolt ended up not quite perpendicular, but with a little effort the pier did drop down right where I wanted it to be!  Success!
Drilled and sucked out with vaccum

It fits!

Moving the pier out to the Astro Shack

Moving day
The monster has moved from the hangar finally.  We used the garden wagon to haul this thing out across the yard to the observatory.  I think the whole thing is over 130-lbs total and if you drop it on your foot, it would be a bad day.
Centered and marked 
If you review the previous posting, the rebar was arranged to carefully avoid where the bolts would be drilled in.  Again, drilling the holes and hitting rebar would also be a bad day.
The pier was placed into the center of the slab and carefully centered.  I used a big marking pen to mark it on the cement for later.  


Cement base poured - and a memorial.

Ready for cement
A little bit of Alex in there
Again, a long time since I've updated this, so here is some catch-up on the construction of the Crest Astroshack.  We finally got the base cement mixed and dumped into the hole.  The hole wasn't quite as deep as I hoped, but digging in our backyard really, REALLY sucks!
It's probably just under 2 feet deep, but with all the pebbles, fist sized rocks, and the 75 lb boulders down there, I figured there was a pretty good surrounding foundation for anything there.
Rebar cage was constructed and suspended in the hole so the horizontal parts would stay in the middle of the slab.
As a tribute and permanent memorial to our late friend, construction supervisor, and helper cat - Alex - we mixed in some of his ashes into the base and put his name on it.   He'll forever be an observing companion.  We miss him terribly, but know he'll always be out there!

Mix and pour


Done!
Alex forever